Aerius - Vision in Autonomous Driving
To drive safely, autonomous vehicles need various sensory information, including camera images, depth perception via LIDARs or depth cameras, geolocation, and more. How to best use and fuse those data streams is an important question that we investigated as part of our final project in the TUM Deep Learning for Computer Vision (DL4CV) class.
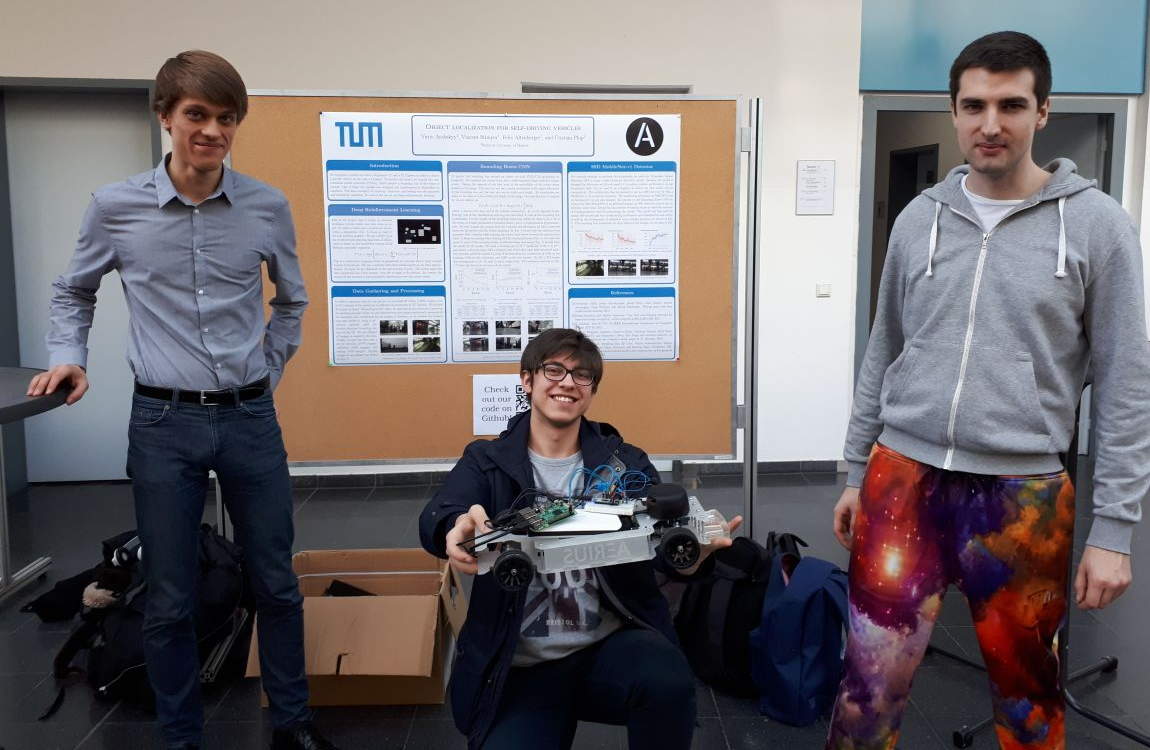
Before the project began, Yuriy (picture middle) had built an Arduino-based model car, for which he even custom-made most of the hardware. He also implemented a reinforcement learning agent based on Q-learning that can control the vehicle to evade objects based on LIDAR information. He trained this agent in a simulated environment as shown below:

Project Overview
Our goal now was to add a camera to the model car, use it to detect some special object that the car should follow, and then fuse the detection results with the reinforcement learning part. In the end, we wanted the car to be able to follow a given object while evading obstacles at the same time.
- Duration: October to February 2018 (5 months)
- Team: 2 other M.Sc. students from Informatics/Physics and me
- My Responsibilities: model development, ML pipeline setup, inference code for Raspberry Pi
Special Project Requirements
Object detection is a standard task in computer vision. However, we needed it to work in real-time and wanted to run it on the model car itself (more specifically: on a Raspberry Pi connected to the Arduino). This meant that we had to:
- design an incredibly lightweight model that could be inferenced in real-time even on a Raspberry Pi CPU,
- write custom code to record images with a PiCam, inference the model, and return the detection in a suitable format,
- install TensorFlow and OpenCV on a RaspberryPi (which is much harder than it seems since you need to build several requirements from source)
Data Collection
Now, what should the object be that we want the model car to follow? After some discussion, we decided to buy special-colored pants, which would allow us to do a cool demo in the end where the car would follow one of us around. Also, using strong or unusual coloring meant that the detection should be fairly simple, which is crucial when you need your application to be stable and have strict performance limits like running on a Pi CPU.
Thus, we bought the most weird-looking pants we could find (which I’m wearing in the teaser image) and recorded 20 videos in various environments on our university campus. In total, we captured 14582 frames, which we then labeled partly by hand and partly using linear interpolation. We then augmented the data using horizontal flipping and split it into train, validation, and test. An example image from our dataset is shown below, with the ground truth bounding box drawn in red.

Model Design & Development
As a first attempt to perform the localization, we used the Tensorflow Object Detection API to train an SSD detector with a MobileNet-v1 feature extractor, which was pretrained on MSCOCO and then fine-tuned on our own dataset. We used this model as a placeholder during the development process and as a baseline to which our other model could later be compared.
Then, we designed a custom architecture based on VGG16, where we replaced the output layer with a fully-connected layer with five output scores. The sigmoid of the first score was the probability of the object being present in the image, the next two scores the x and y coordinates of the upper left corner of the bounding box, and the last two its width and height relative to the image. We initialized the earlier not-replaced layers with pretrained ImageNet weights and fine-tuned the whole model on our dataset.
Model Inference on Raspberry Pi
To inference our model, we wrote a script that reads frames from a webcam using OpenCV, feeds them into the machine learning model, and then returns the coordinates of the detections as a NumPy array.
We also added command-line options to the script to choose whether to:
- read from a PyCam (on Raspberry Pi) or a standard webcam (for testing/debugging on a laptop) or a directory of files (for quantitative scores),
- use our own model or the one from Tensorflow Object Detection,
- visualize the detection results in real-time on the screen (for live demos)
Result
In the end, our original goal of combining the computer vision and reinforcement learning components did unfortunately not work out in time because fusing the inputs in the car’s controlling unit was more difficult than expected. Also, we couldn’t get both components to work on the same Raspberry Pi (yes, we had our vision pipeline working on one Pi and the controller on another but couldn’t get them together. Sad story, but that’s how it is sometimes…).
However, we managed to get a solid object detection model running in real-time on a Raspberry Pi, created a live demo that we showcased during our poster presentation, and received the best possible grade.

Takeaways
- The ML model is the heart of every machine learning application, but in real-world scenarios, it only represents a small fraction of the work that has to be done. In practice, boring tasks like data collection, infrastructure setup, etc. are equally important to get right and they often require significantly more time and resources.
- Deep learning models don’t always need to be giant. For some tasks, even a Pi CPU can be enough if you design your model accordingly. Small models also don’t overfit as easily, so start small and go deep only if you think you underfit.
- If you use your own data, pretraining is crucial. Just always do it.